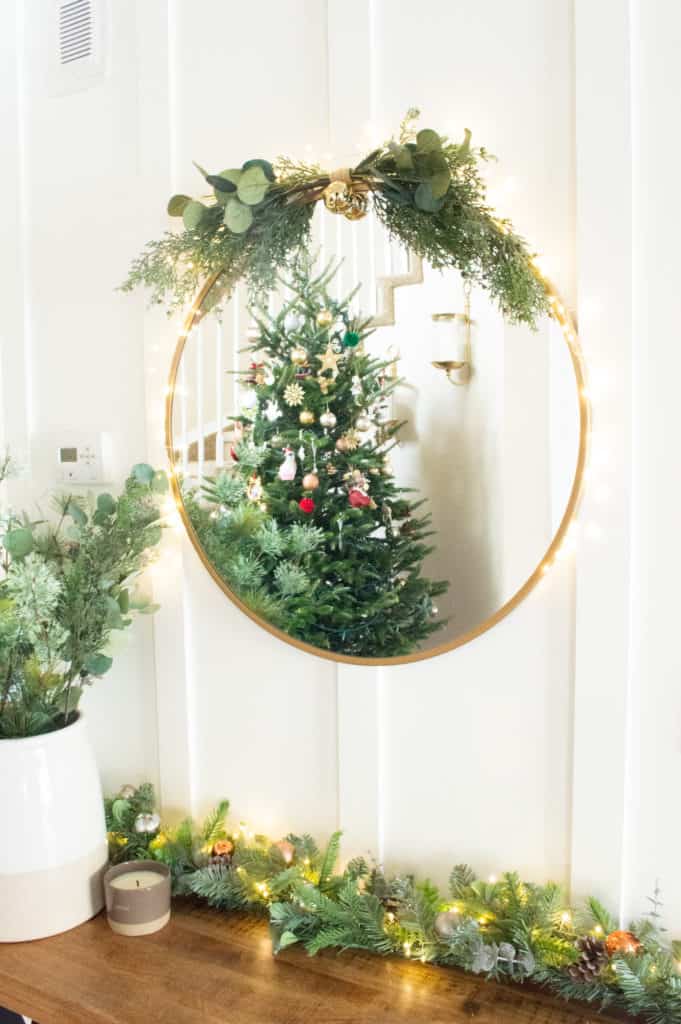
Want to pretty up your round mirror for Christmas this year? Try out my tutorial for this simple and modern DIY Christmas Mirror swag to hang over your mirror!
This post contains affiliate links for your convenience. You can read my disclosures policy here.

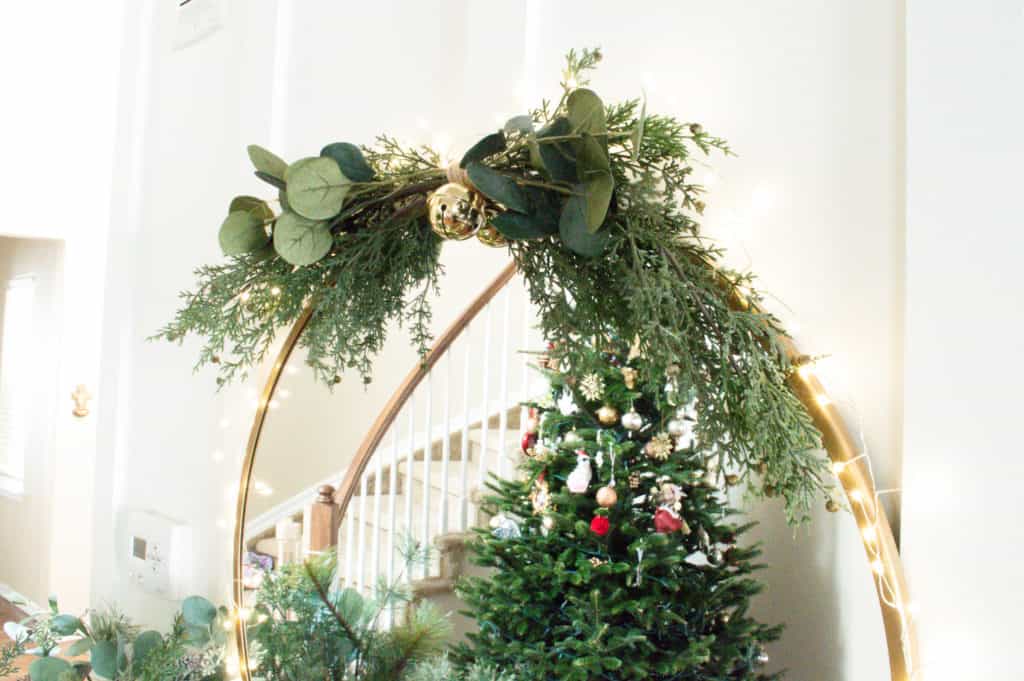
I have a brass round mirror above my console table in my entry and I wanted to do something pretty and simple above it for Christmas this year! I have seen lots of bloggers with pretty natural cedar garland draped over their round mirrors, but I honestly couldn’t figure out how to hang it! Whomp whomp….
So I decided to create an alternative option that would be easy for me to hang!

On Instagram, a group of ladies started a hashtag called #stopdropanddiy and set up a series of challenges to make a DIY Christmas decoration for under $25.
So I decided to come up with this simple and easy DIY Christmas mirror swag that is so easy to hang over your mirror!
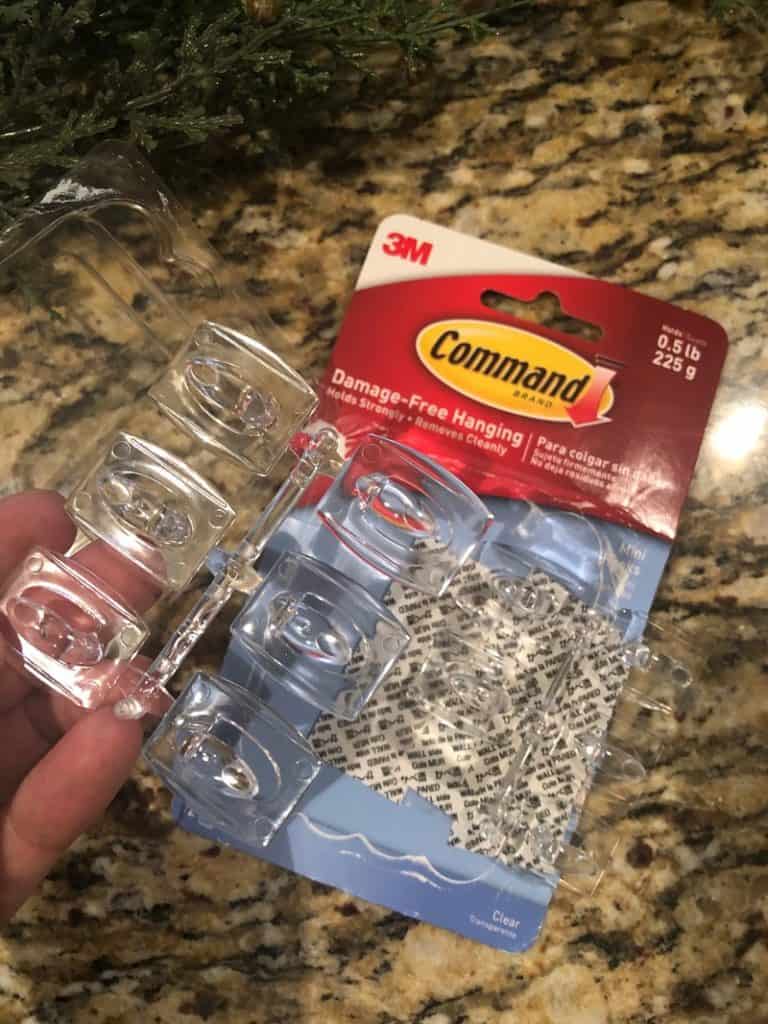
It costs around $20 to make and was hung with a command hook. Yay! So simple and easy. And it turned out pretty darn cute! If you wanna see how I made it, check out my tutorial below 🙂
Materials And Supplies Needed
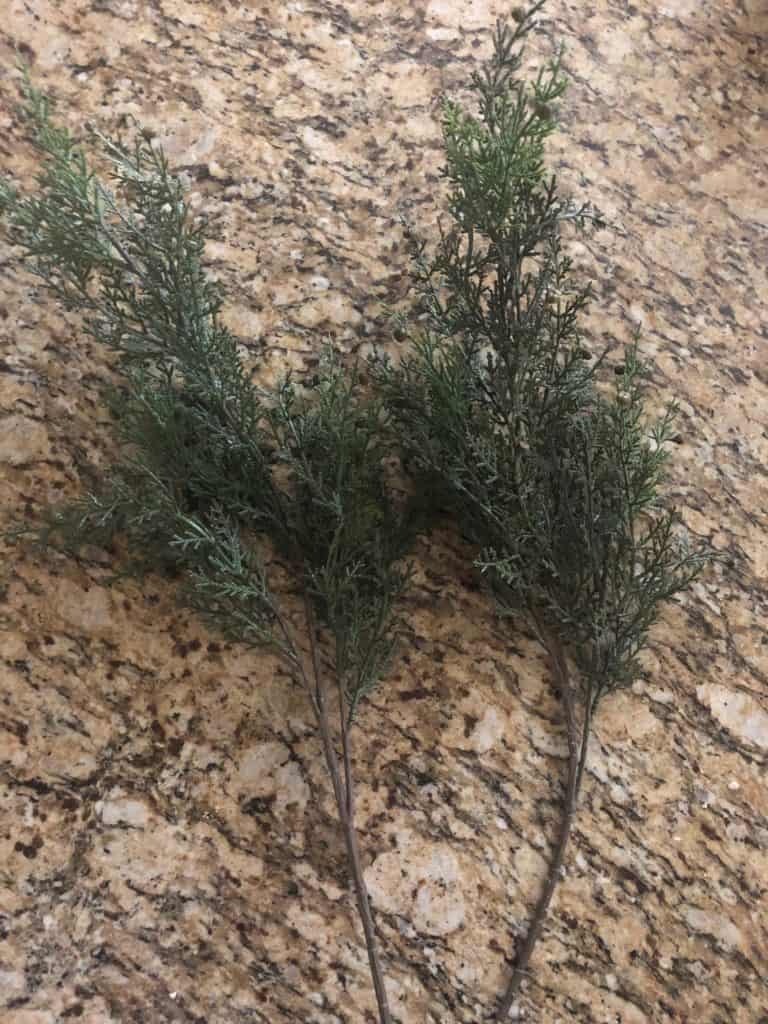
- 2 Faux Pine Branches
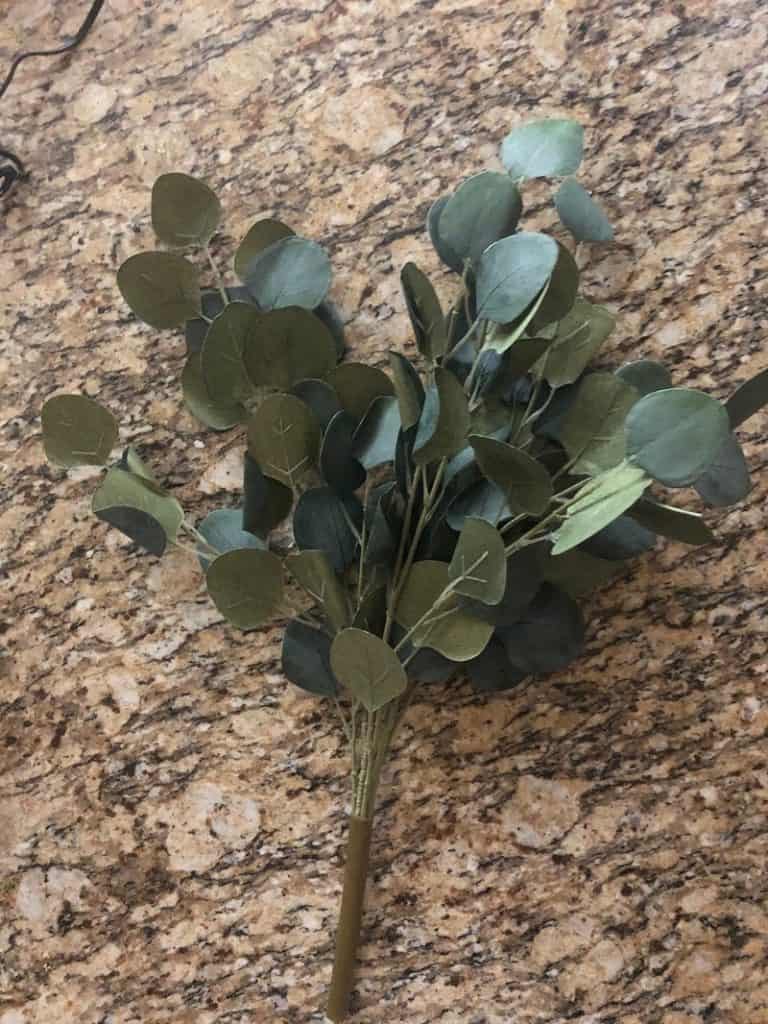
- Faux Eucalyptus Stems
- 1 Brass Bell
- Floral Wire
- Twine
- Wirecutter
- Command Hook for hanging
DIY Christmas Mirror Swag Tutorial
If you want to learn how to make this simple and easy DIY Christmas mirror swag that you can hang over your mirror, check out my tutorial below!
Step 1: Trim & Shape Faux Greenery
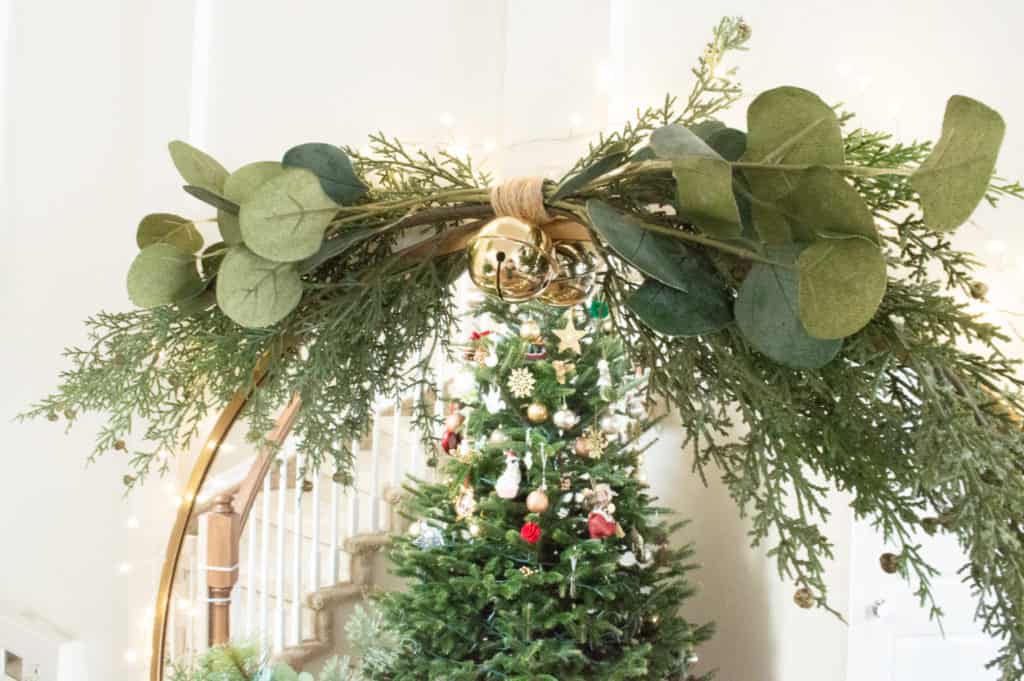
For this Christmas mirror swag, I trimmed off a few stems from this eucalyptus branch and used two faux pine branches. You can use more or less greenery, depending on how thick you want your swag to be.
You can use other types of greenery too! This DIY is very easy to customize for the color and look that you want. I liked the look of pine and eucalyptus because it gave a classic and simple Christmas feel.
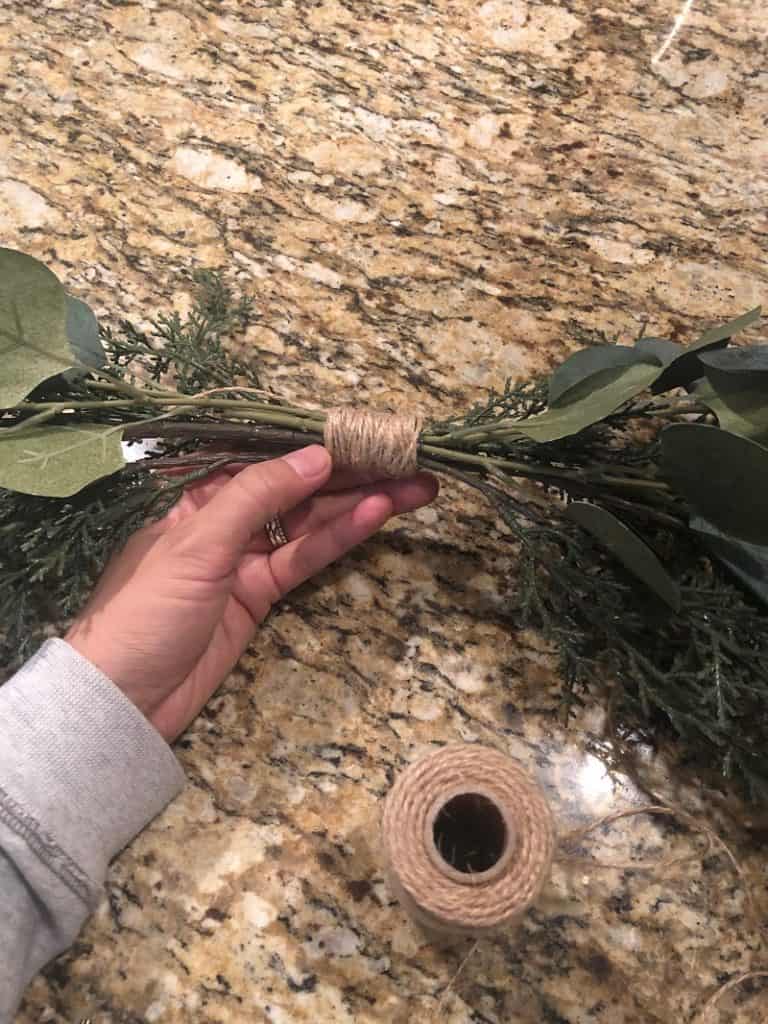
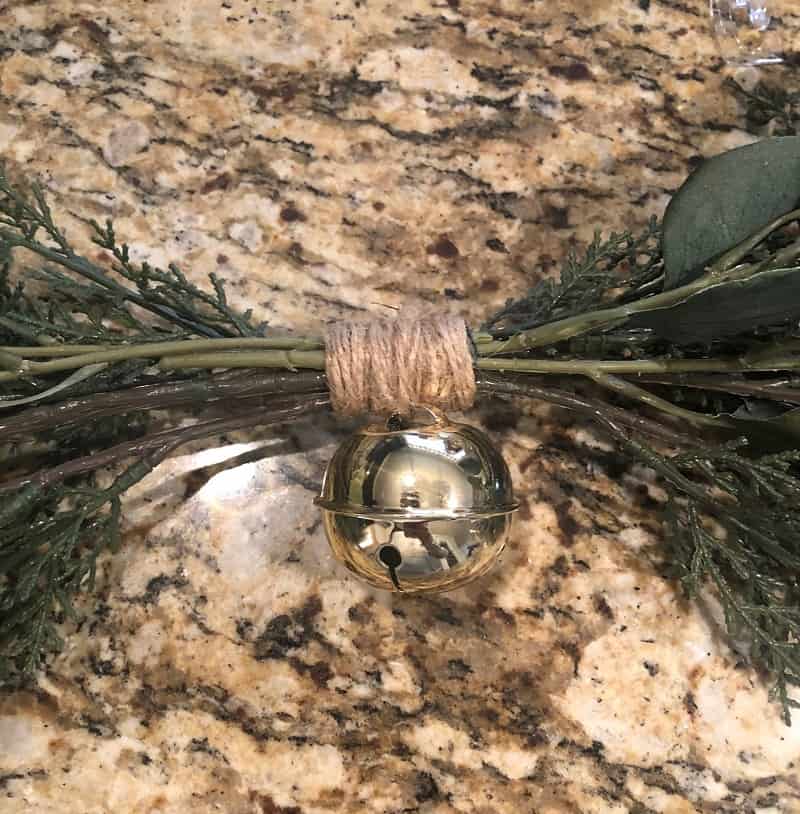
Step 2: Tie with Floral Wire
After deciding how much greenery to use and trimming them off, I tied them together with floral wire. I wrapped the center of the swag several times with the wire until the two sets of branches were securely tied together.

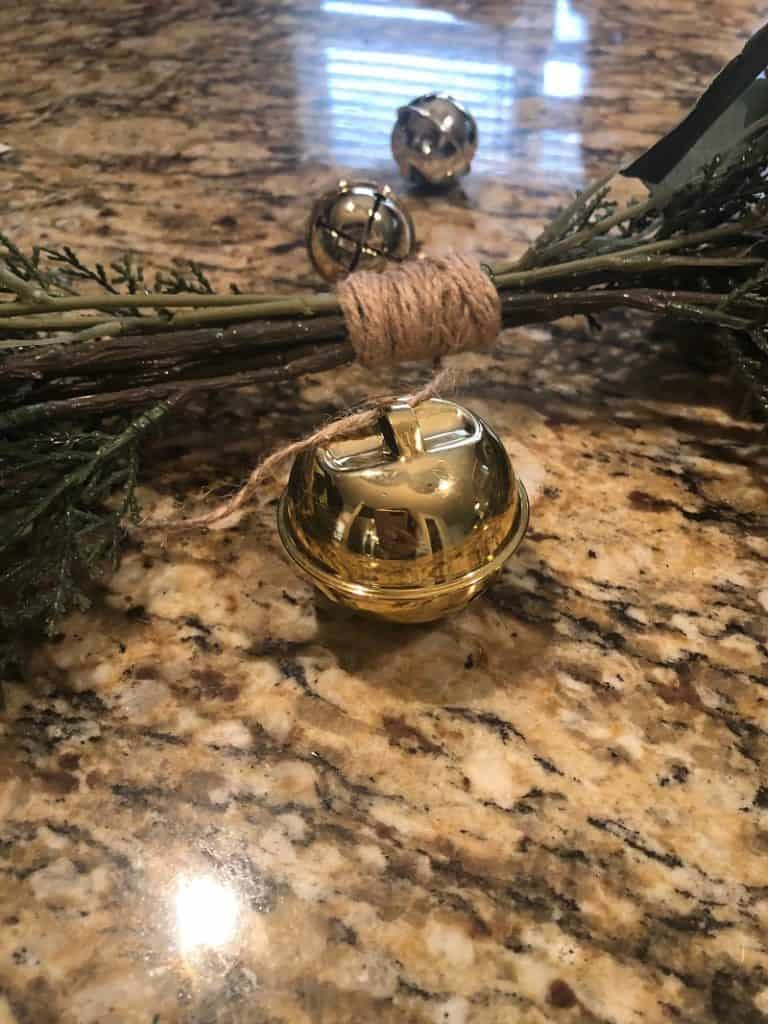
Step 3: Wrap with Twine and Attach Bell
To give my Christmas swag a prettier and completed look, I wrapped the floral wire over with twine. I decided to use twine because I felt that it kept that natural feel and look that I was going for.
And after wrapping the twine several times and getting the coverage I wanted, I strung the twine through the bell. Once the bell was on, I cut the twine and created a knot to secure it.
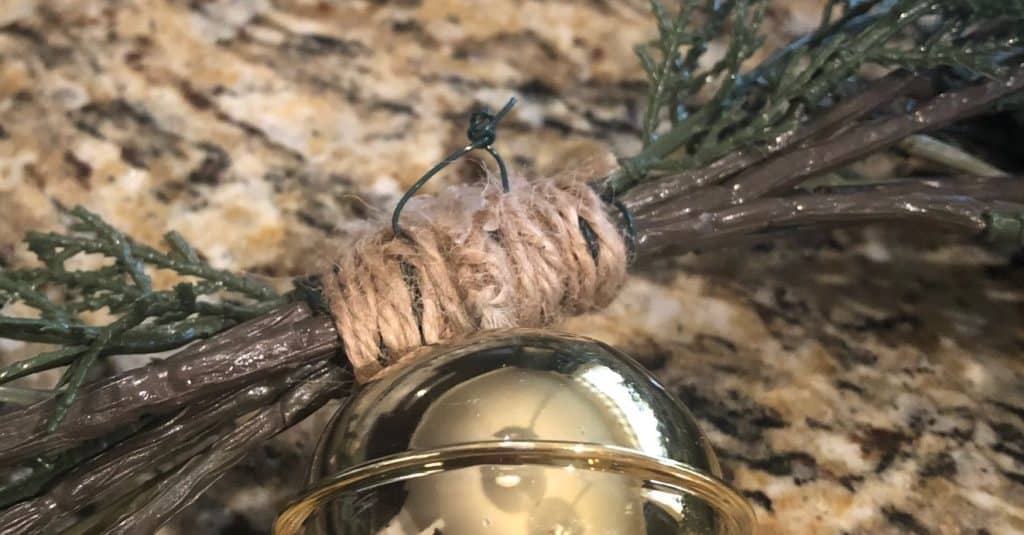
STep 4: Create The Hook and Hang
This part was honestly the trickiest for me! I wish I kind of planned this part better, but I created this quick and had to figure it out as I went haha. So if you have a better idea, go for it!
But what I ended up doing was taking the floral wire, and carefully running it under the backside of the twine (opposite side of the bell), and creating a hook. You can see how it looks below.
If I made this again, I probably would have created that hook first and wrapped it with twine as I went, instead of attaching it last. It was tricky getting it under the twine, since I wrapped it so tightly.
And you are all Done!
Thank you for following along with me on this simple and easy DIY Christmas Mirror Swag tutorial! For this DIY challenge, I literally forgot it was due that day, and busted this piece out in 15 mins! LOL. So it’s very easy and quick to make.
And despite me rushing through it, it turned out super cute. Plus it is something I can use again next year for my Christmas decorating!
Also, if you want to check out another easy and simple DIY, check out my modern Christmas wreath I made this year! It turned out sooooo good!
Have a great Christmas my friends!